If you love Southeast Asian cuisine, you already know that Bunga Kantan (Etlingera elatior)—commonly known as Torch Ginger—is the absolute star of the show. Its bright, zesty, and highly aromatic profile is irreplaceable in iconic dishes like Asam Laksa, Nasi Kerabu, and Tom Yum.
While buying fresh buds from the market can get pricey, growing this striking tropical perennial in your own backyard is incredibly rewarding. Not only will you have a lifetime supply of fresh ingredients, but the plant itself doubles as a magnificent, structural ornamental showpiece.
Here is your complete, step-by-step guide to successfully growing Bunga Kantan from a simple root rhizome.
1. Location & Soil Requirements
Bunga Kantan is a true child of the tropics. To thrive, it mimics the conditions of its native rainforest edges.
Sunlight and Space
Find a spot in your garden that receives at least 6 hours of sunlight daily. While it loves the sun, a location that offers some light afternoon shade will protect the leaves from scorching during intense heatwaves.
Important Space Warning: Do not underestimate the size of this plant! Torch ginger stalks can easily shoot up to 3 to 4 meters tall, forming thick, dense clumps. Plant them along fences, property boundaries, or dedicated backyard corners where they have plenty of room to expand.
The Ideal Soil Mix
Torch ginger requires nutrient-dense, loose soil that retains moisture but drains freely. It absolutely detests sitting in waterlogged, stagnant mud, which causes root rot. Create a custom blend using:
-
- 50% Quality garden topsoil
- 30% Well-aged manure or organic compost
- 20% Sand or perlite (to guarantee excellent drainage)
2. Step-by-Step Rhizome Planting
While you can technically propagate Bunga Kantan from seed, it is a painstakingly slow process. Starting from a rhizome (the thick, underground root section) cuts your waiting time in half. Look for a healthy, plump rhizome that feels firm and features at least one visible green shoot or bud pointing upward.
To get your root off to the best start, follow this careful planting sequence:
3. Care & Maintenance
Once established, Bunga Kantan is a resilient, low-maintenance plant. However, to coax out those coveted flower buds, you must stick to the three golden rules of ginger care:
Watering
Keep the soil consistently damp. During the first month of growth, the rhizome is working hard to establish its root network. Water heavily once a day—or twice daily if you are experiencing intensely hot, dry weather.
Mulching
Because Torch Ginger requires constant moisture, mulching is mandatory. Spread a thick, 5-to-10 cm layer of dried leaves, wood chips, or grass clippings around the base of the stalks. This keeps the soil cool, prevents water evaporation, and naturally suppresses nutrient-stealing weeds.
Fertilizing
Bunga Kantan is a voracious feeder. To support both its massive leaf canopy and upcoming flower production, work a handful of organic compost, chicken manure, or a balanced slow-release fertilizer into the soil around the base once every month.
4. Harvesting the Perfect Bud
Patience is a virtue when growing Torch Ginger. Expect your first flower stalks to emerge roughly 12 to 18 months after planting.
The secret to a great culinary harvest lies entirely in the timing:
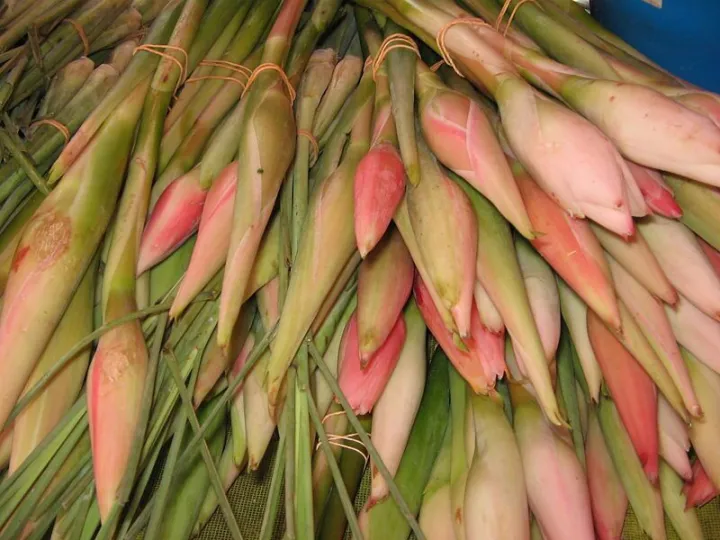
- When to Harvest: Cut the stalk when the flower bud is still tightly closed and firm, or just barely starting to show a hint of opening.
- What to Avoid: If you let the bud bloom completely into its wide, glorious flower shape, the structure becomes incredibly woody, tough, and loses the concentrated, zesty aromatic essential oils needed for cooking.
- The Technique: Using a clean, sharp pair of pruning shears, cut the flower stalk at a 45-degree angle close to the ground.
Wash the bud thoroughly, slice it finely, and it is ready to elevate your home cooking to restaurant-grade status!